Bring a little bit of nature into your home with these easy-to-create DIY moss wall art pieces. These are my version of the Terrain's frame.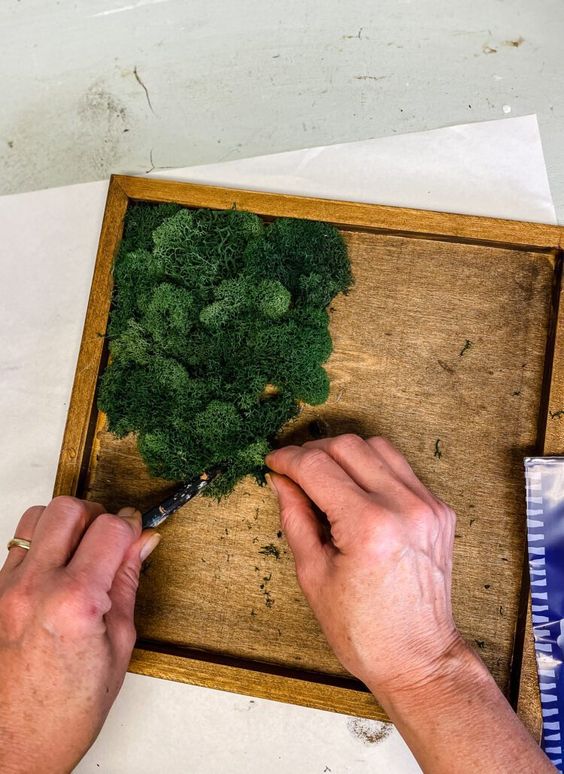
Creating DIY moss wall art is a creative and eco-friendly way to bring a touch of nature indoors. This project allows you to personalize your space with unique designs while adding a calming, natural element to your decor. Here’s a detailed guide on how to make DIY moss wall art:
Materials Needed
- Moss
- Types of Moss: Choose from different types, such as preserved moss, reindeer moss, or sheet moss, depending on the texture and color you desire.
- Base Frame
- Options: Use a wooden frame, canvas, or plywood as your base. Consider the size and shape that will fit your intended space.
- Adhesive
- Types: A hot glue gun or craft glue works well for securing the moss to the base. Ensure it’s strong enough to hold the moss in place.
- Backing Material
- Options: Optional backing like burlap, felt, or fabric can be used to add texture and a finished look.
- Tools
- Scissors (for trimming moss), a paintbrush (for applying adhesive), and possibly a staple gun (if using fabric backing).
Steps to Create Moss Wall Art
- Design Your Layout
- Plan your design by arranging the moss on the base without gluing it first. Experiment with colors, textures, and shapes to find a composition you like.
- Prepare the Base
- If using a frame or canvas, ensure it’s clean and ready. If using fabric backing, stretch it tightly over the frame and secure it with staples.
- Cut and Trim Moss
- Trim the moss to fit your design. This may involve cutting pieces into specific shapes or sizes to create your desired look.
- Apply Adhesive
- Use the glue to apply a thin layer on the base where you’ll place the moss. Work in sections to avoid the glue drying before you apply the moss.
- Attach the Moss
- Firmly press the moss onto the glued areas. Start with larger pieces and fill in with smaller ones, ensuring a full and rich appearance.
- Let It Dry
- Allow the glue to dry completely according to the adhesive’s instructions. This typically takes a few hours.
- Finish the Edges
- If needed, trim any excess moss at the edges for a clean look. You can also add decorative elements like flowers, branches, or stones for added interest.
- Mounting
- Once your artwork is dry and complete, decide how you’ll hang it. Use picture hangers or adhesive strips depending on the weight and your wall type.
Tips for Success
- Color Variation: Mix different moss types to create depth and visual interest.
- Maintenance: Preserved moss requires minimal care, but avoid direct sunlight and high humidity to keep it looking fresh.
- Experiment: Feel free to incorporate other natural elements like dried flowers or wood pieces to enhance your design.
Conclusion
DIY moss wall art is a fun and creative project that allows you to express your artistic side while bringing a piece of nature indoors. Whether you prefer a minimalist look or a more elaborate design, this project can be tailored to fit your style, creating a unique focal point in any room. Enjoy the process and the beauty of your handmade creation!